Here's a couple pictures I took with my handy iPhone...the room itself is absolutely gorgeous, so it didn't need much decorating.
Table decorations:
* Blue and grey table confetti shaped like flowers
* Plant from Trader Joe's, wrapped in kraft paper and tied with blue ribbon
* Vase filled with oreos, tied with blue ribbon
* Bag of jelly beans
* Plastic box containing matching blue cupcake holder insert (made at 1am the night
before), choco or vanilla cupcake, tied with blue ribbon, and 2 stickers saying
"Rori's Bridal Shower 8/22/10" and "Thanks for coming!"
The fun hanging white balls are actually tissue pom poms. I love them!
Wednesday, August 25, 2010
Thursday, August 19, 2010
Thanks to Dan
Tuesday, August 17, 2010
Bridal Shower Shennanigans (did I spell that right?)
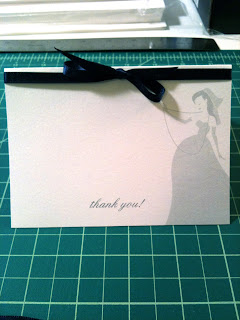
I'm throwing a bridal shower for my dear friend, Rori, and was given free reign on designing the invitations. I found this cute pinwheel-style packaging at Paper Source, and then heat-embossed a stamp I made that reads "a bridal shower event..." I really liked the "opening ceremony" of it. The invitation was printed on textured, white paper. Designing the girl took quite awhile...first I made her bangs too big, then her arms were too fat, etc. I finally got it the way I wanted though :)
And this is a bingo card I quickly threw together that will be one of the bridal shower games. Players will use little paper hearts I punched out of teal and grey paper as their game pieces (not pictured).
Monday, August 9, 2010
The Perfect Bind
I went to an awesome bookbinding workshop yesterday and made this. The great thing about a perfect bind is that the book opens flat, which is nice for art books. The covers seem a little bulky so I'm going to start making them with a soft cover and larger sheets of different colored paper as sketchbooks. Sometimes you just want to draw on non-white paper. Also with a soft cover, you can actually fold the entire book backwards under itself to make a sturdy sketchpad.
Saturday, August 7, 2010
A Chris Sanders business card
My director, Chris, saw Rad's business cards and was dying to have some of his own. How could I say no to the chance to letterpress an incredibly talented and famous artist's business cards? I couldn't. Here they are. They were terrifying and intimidating to print. They were even more terrifying to present to him; thank goodness he liked them.
I ran into the same problem printing Chris' signature as I did with printing Rad's name in the cards below. They took SO MUCH INK to lay a solid color on the letters and took many tries, but after printing Rad's the week before, I was more aggressive in getting enough ink on the rollers. Another problem I ran into is that when I flipped the paper over to print the tiger (I printed that part last), I noticed that it lifted the impression on the text side up a little. The impression is still there, but not as deep as I'd like. Something to remember for the next time I print something double-sided.
Wednesday, July 21, 2010
Simple and Letterpressed
I wanted Rad to have business cards on hand at the 2010 Comic-Con, so I took it upon myself to design something and print them at the Art Center Letterpress studio. As simple as it seemed, (they are only 3.5" x 2" after all) they took forever. My teacher always told me there was no such thing as a "quick letterpress run," and I think I'm finally convinced.
The text information was printed first. My rollers kept dropping, but only on one side, making the text impress more on the letters on the right side of the card. I adjusted these about 4x before I finished printing 100 cards. Then I switched plates and began printing his name. The trial and errors in printing his name are too extensive to type, but I will say I was thrilled when I finally got them to print evenly, and am happy with how they turned out.
Subscribe to:
Posts (Atom)